Logging In with Open OnDemand
Open OnDemand is a portal site that allows users to connect to the supercomputer system via HTTPS (443/TCP).
We have started offering an Open OnDemand experimentally from June 2025.
To use the Open OnDemand remote access service, a web browser such as Google Chrome or Firefox is required. No dedicated client software or browser plug-in is necessary.
Your login account must be activated.
-
Open your browser and navigate to the following address.
Type URL Open OnDemand https://ood.kudpc.kyoto-u.ac.jp/
Please refer to Two-factor authentication login for instructions on how to log in.
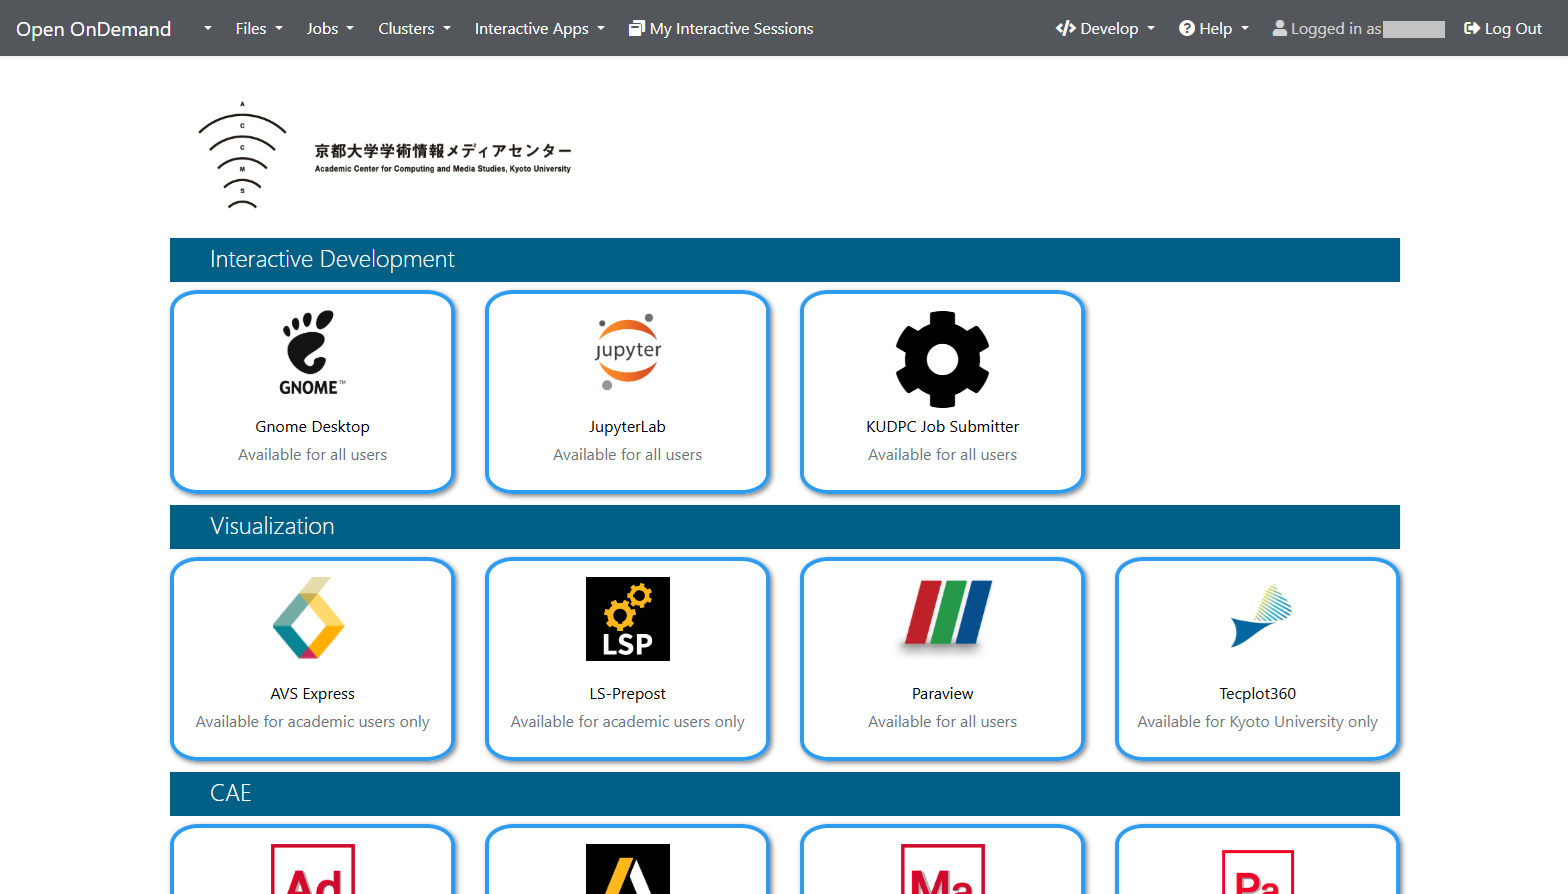
- After a successful login, the main page will be load.
Each application icon has a description of the available users.
- for all users:Available (but please comply with the license of each software)
- for academic user only:Available for academic research institutions only
- for Kyoto University only:Available for Kyoto University members only
-
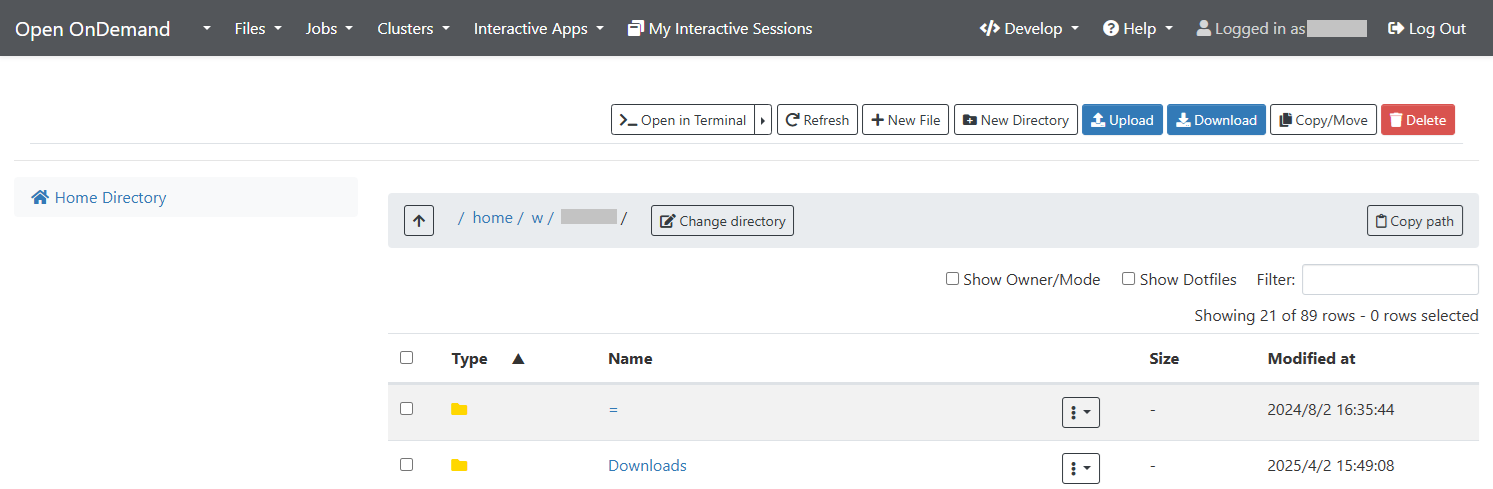
Selecting Home Directory from the Files menu will display the contents of the home directory.

-
You can manipulate files and directories using the buttons on the screen, etc.
Creating symbolic links to Large volume storage is useful.


-
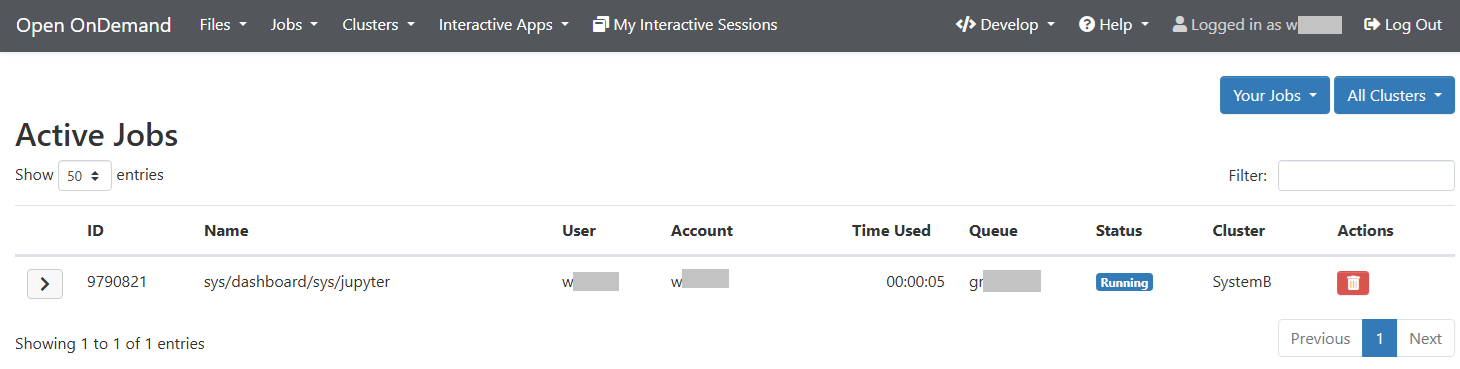
From the Jobs menu bar, select Active Jobs to view a screen with details about your current jobs.

-
From there, you can view job details and cancel jobs using the buttons on the screen.


1.Press SystemX Shell Access from the Clusters menu bar.
, you can log in to each subsystem login node with a terminal.

2.The Shell Operation screen will open in a separate tab.

-
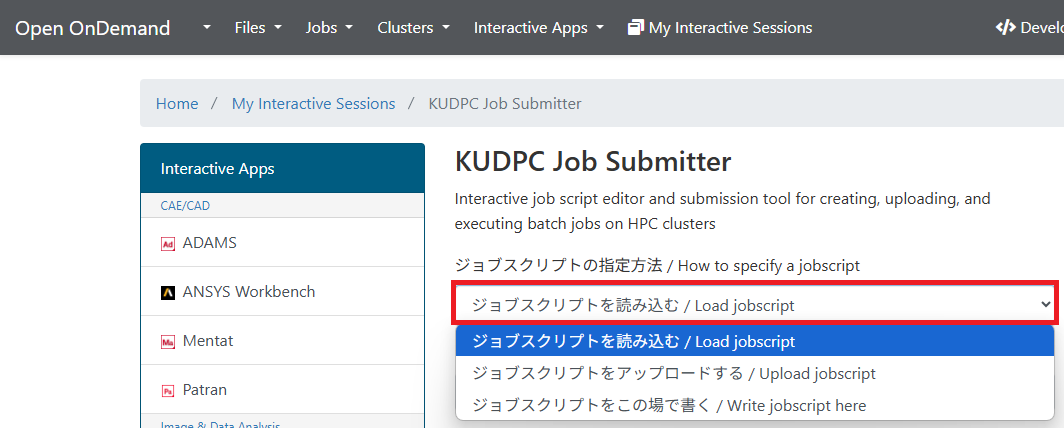
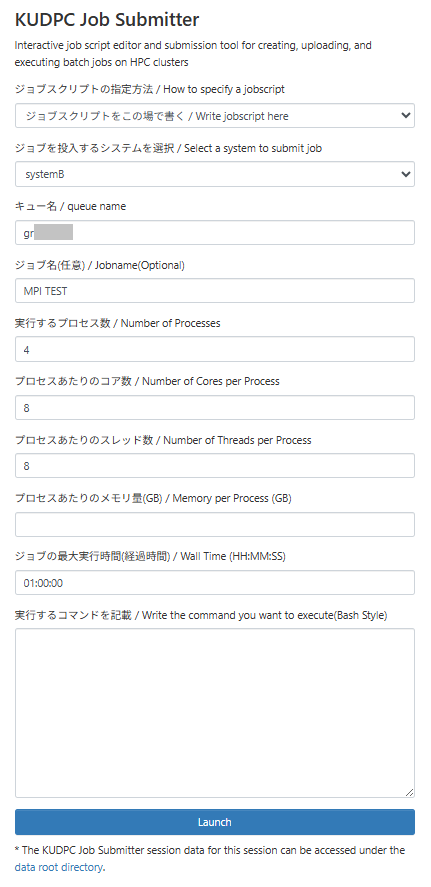
Pressing KUDPC Job Submitter on the top screen will bring up the job submission screen.

-
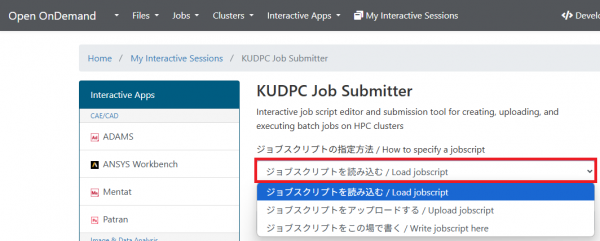
The KUDPC Job Submitter screen will appear.
There are three options available for specifying job scripts.- Load jobscript
- Upload jobscript
- Write jobscript here

-
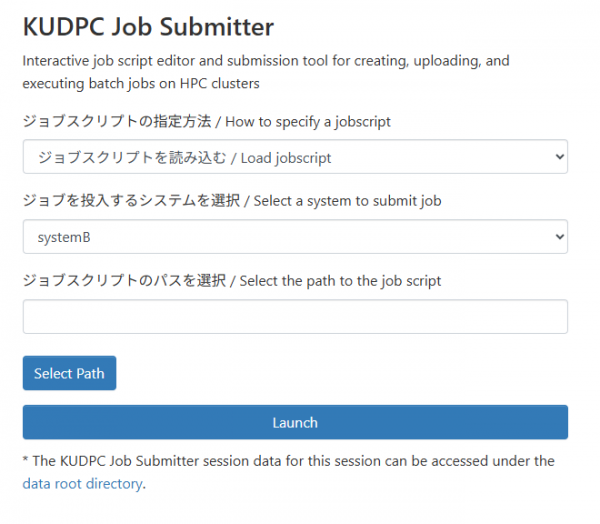
First, select the system to submit the job.
-
Then, click "Select Path" to choose the location of the job script.
-
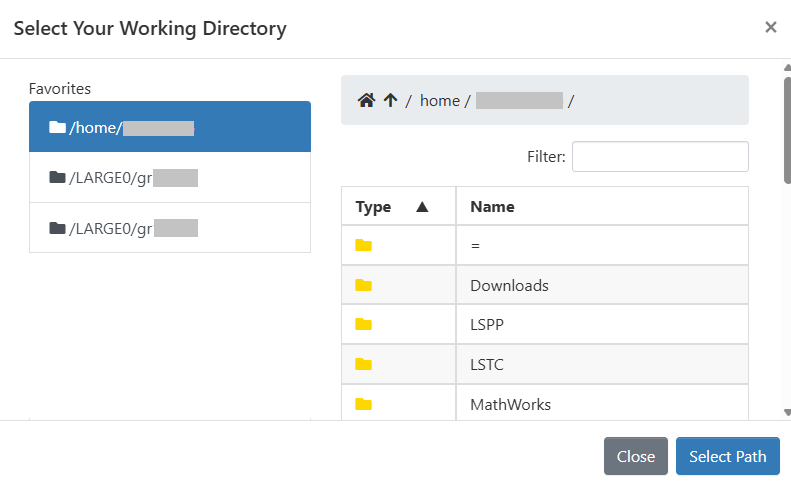
The path selection screen will appear. Select the job script you want to run.
Select the job script you want to run. The path will then be entered back into the original screen.

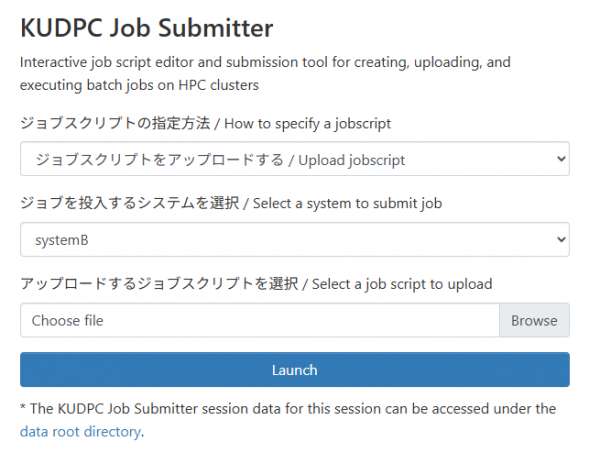
- First, select the system where you want to submit the job.
- Then, select the job script to upload and click "Browse".
- A file selection screen for your local PC will appear. Select the script file you wish to run.
- Finally, press "Launch" to run the job.

From this screen, you can generate new jobs, select a system to submit jobs to, change options, and edit scripts.
See Job script for information on how to edit scripts.
The section of the job script that refers to === Slurm Options === is specified on this screen, so it does not need to be included in the script.
1.Press the JupyterLab button at main screen.

- Enter the desired settings in the entry form.
After filling out the form, cluck Launch.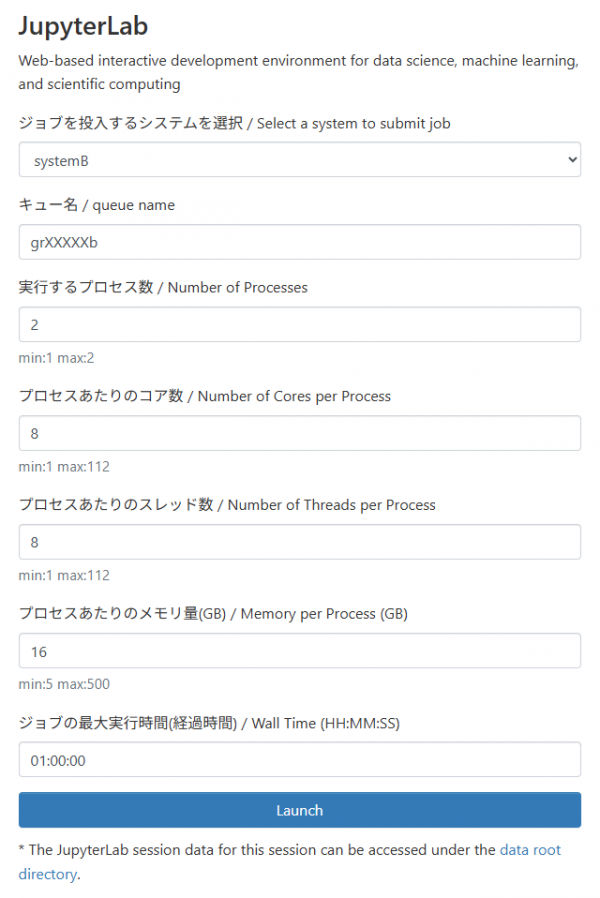

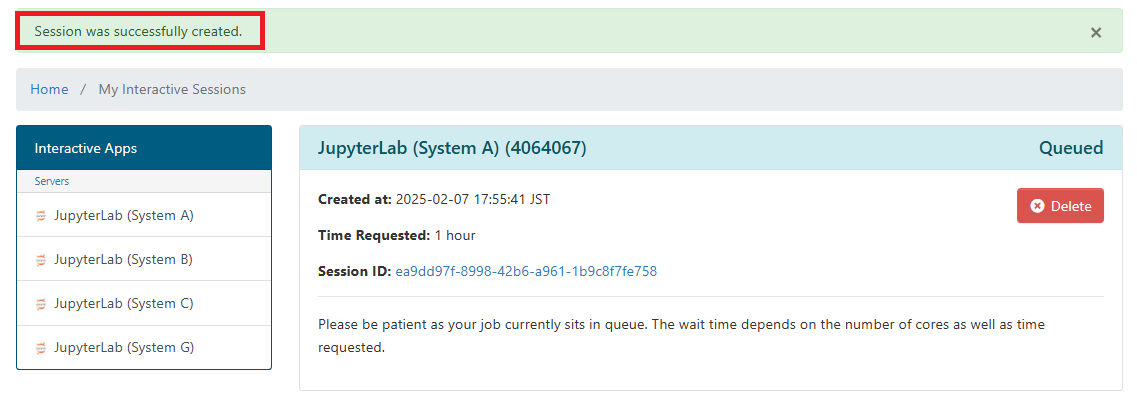
3.After “Session was successfully created.” appears at the top,
Wait a moment or refresh the screen to see the “Connect to Jupyter” button.
Click “Connect to Jupyter” to connect to Jupyter Lab.

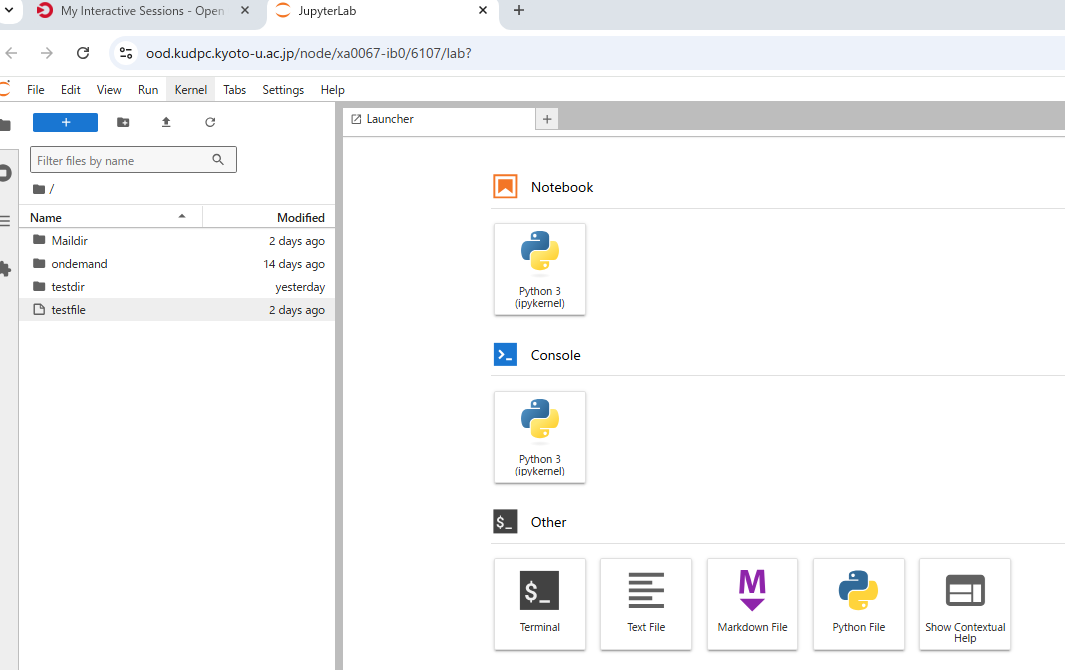
4.Jupyter Lab will then display each user's home directory.
If you are using Large volume storage, please create a symbolic link so that you can access it from your home directory.
-
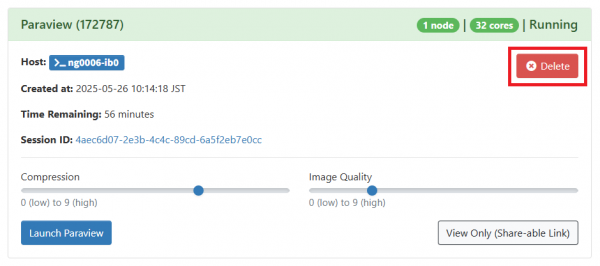
Press “My Interactive Sessions” on the menu bar to display the session list screen.

-
To delete a session, press the Delete button on the session list screen.

The following error messages appear when parameters are incorrectly set on the various input screens.
The following example is displayed when a job queue is entered incorrectly.

The error message appears on a white background inside a red background frame.
See the table below for how to respond to the main error messages.
| エラーメッセージ | 対応方法 |
|---|---|
| invalid partition specified | Correct the input value of the queue name |
| MaxCpuPerAccount | Correct the input value for the number of processes to run |
| Resource validation error | Correct input values for number of cores, threads, and amount of memory |
| QOSMaxWallDurationPerJobLimit | Correct the input value for the maximum execution time (elapsed time) of a job |